Auckland & Christchurch Warehouses

LOCAL
STOCK

Fast NZ dispatch (1–5 working days)

Up to 10-Year Product Warranty

30-DAY
RETURN

100% NZ-based local support

30-Day Easy Returns

COMPLETE
SOLUTION

Hassle-free returns on eligible products

Trade & Developer Pricing

BULK
SUPPLY

Bulk discounts & dedicated account support
two-img

New Arrivals

Up to 40% OFF

two-img

Clearance Sale

Up to 89% OFF

Best seller products

  • Vanities
  • Bathtub
  • Mirrors
  • Showers
  • Tapware
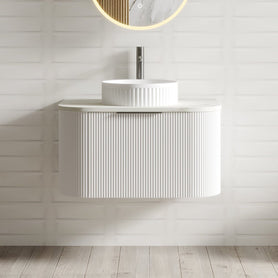
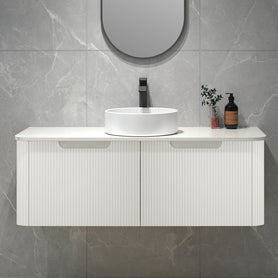
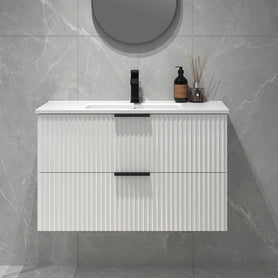
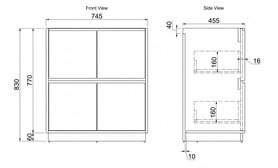
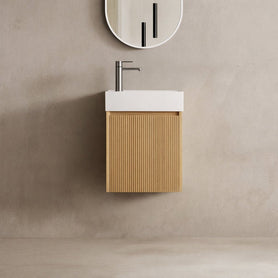
Luma 750X455X450mm Plywood Matte White Fluted Curve Vanity With Flat Top - NZHomeware Luma 750X455X450mm Plywood Matte White Fluted Curve Vanity With Flat Top - NZHomeware Luma 750X455X450mm Plywood Matte White Fluted Curve Vanity With Flat Top - NZHomeware
August Sale-10% Off
NZHomeware
$779.00 $701.10
NZHomeware
$599.00
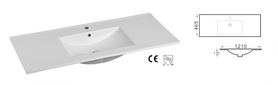
Amos 1210X460X430mm Plywood Matte White Fluted Curve Vanity With Flat Top - NZHomeware Amos 1210X460X430mm Plywood Matte White Fluted Curve Vanity With Flat Top - NZHomeware Amos 1210X460X430mm Plywood Matte White Fluted Curve Vanity With Flat Top - NZHomeware
August Sale-5% Off
NZHomeware
$899.00 $854.05
NZHomeware
$1,975.00
NZHomeware
$568.00
NZHomeware
$549.00
NZHomeware
$877.00
NZHomeware
$1,389.00
NZHomeware
$329.00
NZHomeware
$299.00
NZHomeware
$349.00
NZHomeware
$479.00
NZHomeware
$379.00
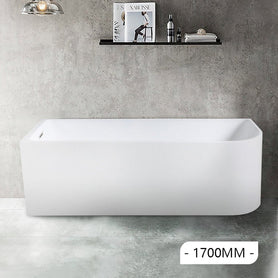
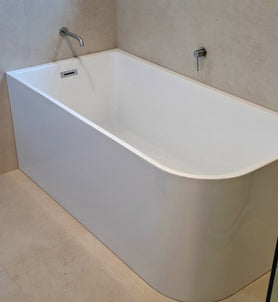
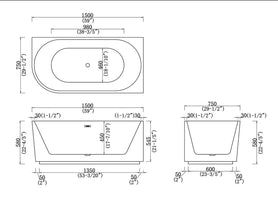
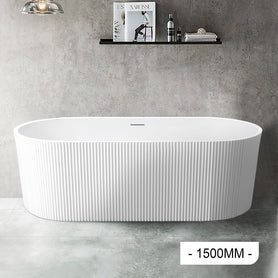
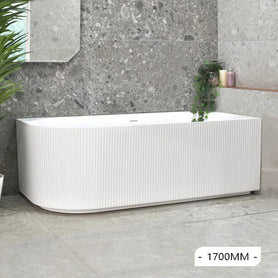
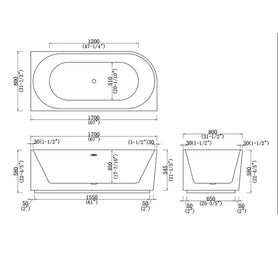
1700x750x610mm Corner Bathtub Left Corner Back to Wall Acrylic White Bath Tub - NZHomeware 1700x750x610mm Corner Bathtub Left Corner Back to Wall Acrylic White Bath Tub - NZHomeware 1700x750x610mm Corner Bathtub Left Corner Back to Wall Acrylic White Bath Tub - NZHomeware
August Sale-5% Off
NZHomeware
$1,259.00 $1,196.05
NZHomeware
$1,269.00
NZHomeware
$1,059.00
NZHomeware
$2,361.00 $1,298.55
NZHomeware
$1,169.00
NZHomeware
$1,399.00
Mercio
$1,329.00
NZHomeware
$650.00 $325.00
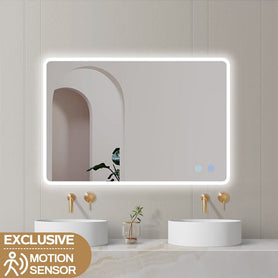
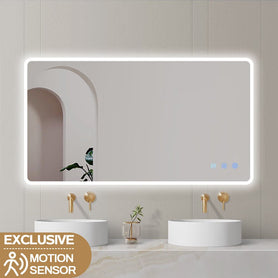
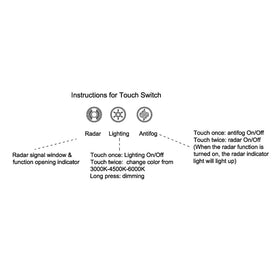
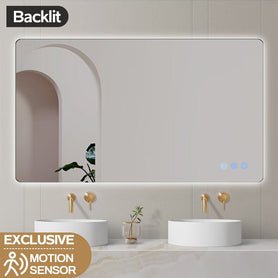
1200x750mm Rectangle LED Mirror with Motion Sensor Auto On Demister Touch Sensor Switch - NZHomeware 1200x750mm Rectangle LED Mirror with Motion Sensor Auto On Demister Touch Sensor Switch - NZHomeware 1200x750mm Rectangle LED Mirror with Motion Sensor Auto On Demister Touch Sensor Switch - NZHomeware
August Sale-15%Off
NZHomeware
$405.00 $344.25
NZHomeware
$349.00
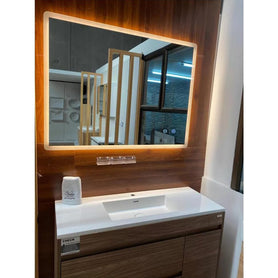
860x740mm Special LED Wall Mirror with Motion Sensor Auto On Demister Touch Switch 3 Colours Lighting on 20mm Rim - NZHomeware 860x740mm Special LED Wall Mirror with Motion Sensor Auto On Demister Touch Switch 3 Colours Lighting on 20mm Rim - NZHomeware 860x740mm Special LED Wall Mirror with Motion Sensor Auto On Demister Touch Switch 3 Colours Lighting on 20mm Rim - NZHomeware
August Sale-20% Off
NZHomeware
$379.00 $303.20
NZHomeware
$289.00
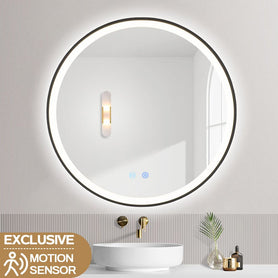
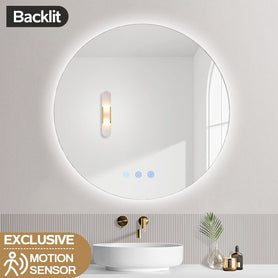
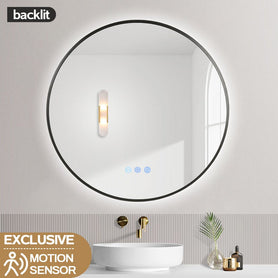
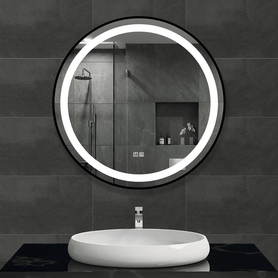
700mm Backlit Gunmetal Grey Frame Round LED Mirror with Motion Sensor Auto On - NZHomeware 700mm Backlit Gunmetal Grey Frame Round LED Mirror with Motion Sensor Auto On - NZHomeware 700mm Backlit Gunmetal Grey Frame Round LED Mirror with Motion Sensor Auto On - NZHomeware
Best Value Collection-30% off
NZHomeware
$512.80 $358.96
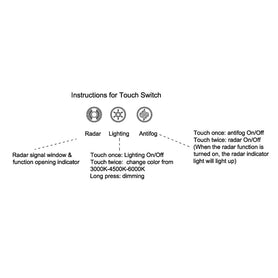
900x750mm Rectangle LED Mirror with Motion Sensor Demister Backlit Touch Switch 3 Colours Lighting Frameless - NZHomeware 900x750mm Rectangle LED Mirror with Motion Sensor Demister Backlit Touch Switch 3 Colours Lighting Frameless - NZHomeware 900x750mm Rectangle LED Mirror with Motion Sensor Demister Backlit Touch Switch 3 Colours Lighting Frameless - NZHomeware
Best Value Collection-20% off
NZHomeware
$319.00 $255.20
900mm Black Framed Round Front Lit LED Mirror with Demister, Three Light Modes and Dimmable Control - NZHomeware 900mm Black Framed Round Front Lit LED Mirror with Demister, Three Light Modes and Dimmable Control - NZHomeware 900x900x40mm Round Bathroom LED Mirror with Motion Sensor Auto On Demister Touch Sensor Switch Wall Mounted - NZHomeware
Best Value Collection-20% off
NZHomeware
$349.00 $279.20
NZHomeware
$699.00
NZHomeware
$1,337.00 $869.05
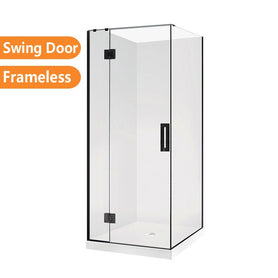
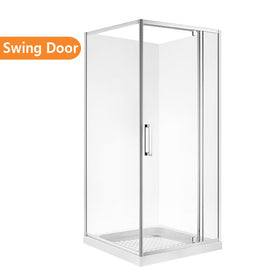
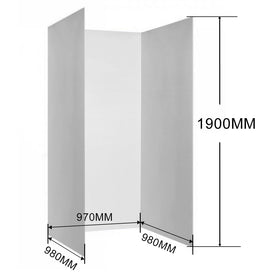
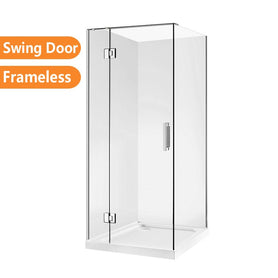
900*900*1900mm Swing Door Square Shower Box - NZHomeware 900*900*1900mm Swing Door Square Shower Box - NZHomeware 900*900*1900mm Swing Door Square Shower Box - NZHomeware
August Sale-10% Off
NZHomeware
$639.00 $575.10
NZHomeware
$709.00
NZHomeware
$629.00
NZHomeware
$669.00
NZHomeware
$869.00
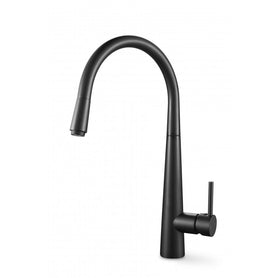
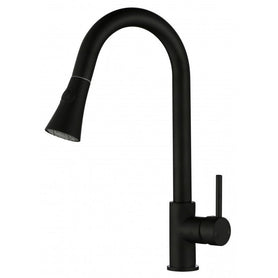
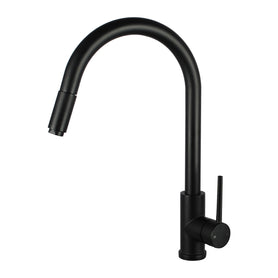
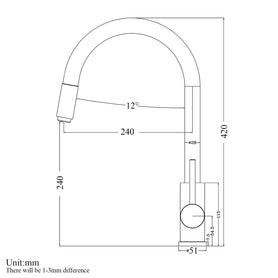
Euro Round Nero Black Pull Out/Down Kitchen/Laundry Sink Mixer Taps Swivel Kitchen Tapware - NZHomeware Euro Round Nero Black Pull Out/Down Kitchen/Laundry Sink Mixer Taps Swivel Kitchen Tapware - NZHomeware Euro Round Nero Black Pull Out/Down Kitchen/Laundry Sink Mixer Taps Swivel Kitchen Tapware
August Sale-15%Off
NZHomeware
$239.00 $203.15
Euro Round Nero Black Pull Out/Down Kitchen/Laundry Sink Mixer Taps Swivel Kitchen Tapware - NZHomeware Euro Round Nero Black Pull Out/Down Kitchen/Laundry Sink Mixer Taps Swivel Kitchen Tapware - NZHomeware Euro Round Nero Black Pull Out/Down Kitchen/Laundry Sink Mixer Taps Swivel Kitchen Tapware
August Sale-15%Off
NZHomeware
$189.00 $160.65
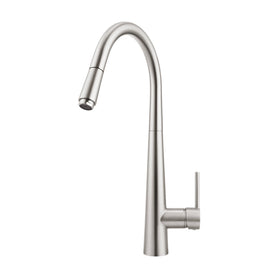
Euro Round Brushed Nickel Pull Out/Down Kitchen/Laundry Sink Mixer Taps Swivel Kitchen Tapware - NZHomeware Euro Round Brushed Nickel Pull Out/Down Kitchen/Laundry Sink Mixer Taps Swivel Kitchen Tapware - NZHomeware Euro Round Brushed Nickel Pull Out/Down Kitchen/Laundry Sink Mixer Taps Swivel Kitchen Tapware - NZHomeware
August Sale-15%Off
NZHomeware
$239.00 $203.15
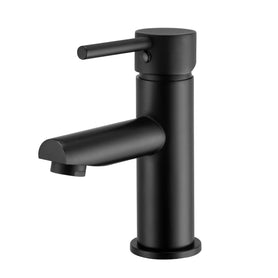
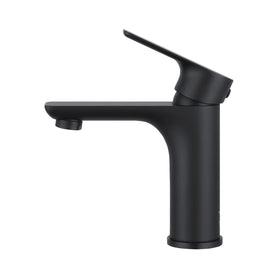
Euro Round Nero Matt Black Bathroom Basin Mixer Tap Black Tap - NZHomeware Euro Round Nero Matt Black Bathroom Basin Mixer Tap Black Tap - NZHomeware Euro Round Nero Matt Black Bathroom Basin Mixer Tap Black Tap
August Sale-20% Off
NZHomeware
$99.00 $79.20
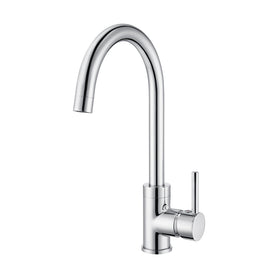
Euro Classic Round Chrome Standard 360 degree Swivel Kitchen Sink Mixer Tap - NZHomeware Euro Classic Round Chrome Standard 360 degree Swivel Kitchen Sink Mixer Tap - NZHomeware Euro Classic Round Chrome Standard 360 degree Swivel Kitchen Sink Mixer Tap
August Sale-10% Off
NZHomeware
$79.00 $71.10
Euro Round Chrome 360° Swivel Pull Out Kitchen Sink Mixer Tap DR Brass - NZHomeware Euro Round Chrome 360° Swivel Pull Out Kitchen Sink Mixer Tap DR Brass - NZHomeware Euro Round Chrome 360° Swivel Pull Out Kitchen Sink Mixer Tap DR Brass - NZHomeware
August Sale-15%Off
NZHomeware
$129.00 $109.65
Ottimo Chrome Bathroom Basin Mixer Tapware - NZHomeware Ottimo Chrome Bathroom Basin Mixer Tapware - NZHomeware Ottimo Chrome Bathroom Basin Mixer Tapware
Best Value Collection-25% off
NZHomeware
$109.00 $81.75
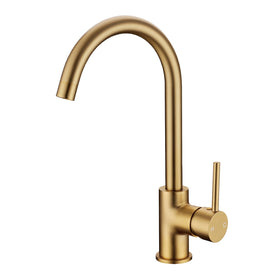
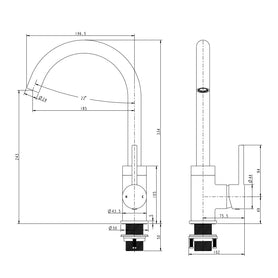
Euro Round Brushed Yellow Gold Kitchen Sink Mixer Tap 360° Swivel - NZHomeware Euro Round Brushed Yellow Gold Kitchen Sink Mixer Tap 360° Swivel - NZHomeware Euro Round Brushed Yellow Gold Kitchen Sink Mixer Tap 360° Swivel - NZHomeware
Best Value Collection-20% off
NZHomeware
$236.00 $188.80
Euro Round Matt Black 360 degree Swivel Pull Out Kitchen Sink Mixer Tap DR Brass - NZHomeware Euro Round Matt Black 360 degree Swivel Pull Out Kitchen Sink Mixer Tap DR Brass - NZHomeware Euro Round Matt Black 360 degree Swivel Pull Out Kitchen Sink Mixer Tap DR Brass - NZHomeware
August Sale-15%Off
NZHomeware
$199.00 $169.15
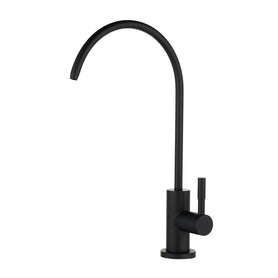
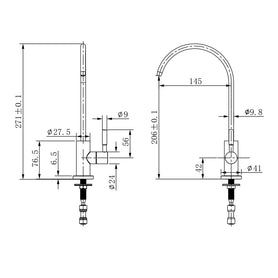
Premium SUS304 Water Filter Stainless Steel Tap RO Drinking Ceramic Disc Faucet Matt Black - NZHomeware Premium SUS304 Water Filter Stainless Steel Tap RO Drinking Ceramic Disc Faucet Matt Black - NZHomeware Premium SUS304 Water Filter Stainless Steel Tap RO Drinking Ceramic Disc Faucet Matt Black - NZHomeware
August Sale-10% Off
NZHomeware
$59.00 $53.10
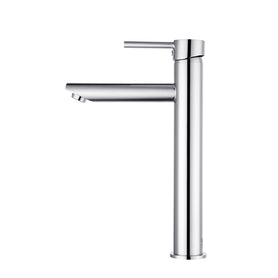
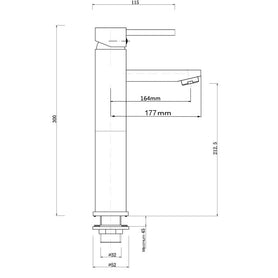
Euro Round Chrome Tall Basin Mixer Taps Tall Tapware - NZHomeware Euro Round Chrome Tall Basin Mixer Taps Tall Tapware - NZHomeware Euro Round Chrome Tall Basin Mixer Taps Tall Tapware
Best Value Collection-15% off
NZHomeware
$99.00 $84.15
NZHomeware
$139.00
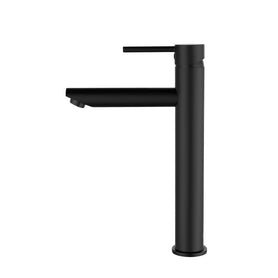
Euro Round Nero Black Tall Basin Mixer Tap Black Taps Tall Tapware - NZHomeware Euro Round Nero Black Tall Basin Mixer Tap Black Taps Tall Tapware - NZHomeware Euro Round Nero Black Tall Basin Mixer Tap Black Taps Tall Tapware
Best Value Collection-15% off
NZHomeware
$139.00 $118.15
Ottimo Nero Black Bathroom Basin Mixer Tapware - NZHomeware Ottimo Nero Black Bathroom Basin Mixer Tapware - NZHomeware Ottimo Nero Black Bathroom Basin Mixer Tapware
Best Value Collection-25% off
NZHomeware
$139.00 $104.25
Chrome Basin Mixer Tap - NZHomeware Chrome Basin Mixer Tap - NZHomeware Chrome Basin Mixer Tap - NZHomeware
August Sale-20% Off
NZHomeware
$99.00 $79.20
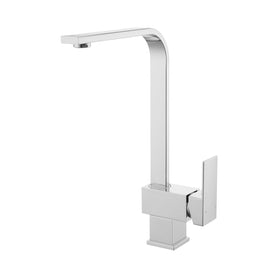
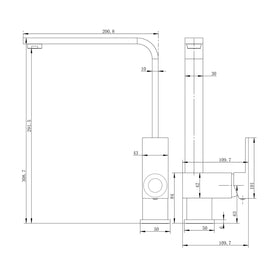
Quadra Chrome Kitchen/Laundry Sink Mixer Taps Swivel Kitchen Tapware - NZHomeware Quadra Chrome Kitchen/Laundry Sink Mixer Taps Swivel Kitchen Tapware - NZHomeware Quadra Chrome Kitchen/Laundry Sink Mixer Taps Swivel Kitchen Tapware - NZHomeware
Warehouse Outlet 35% off
NZHomeware
$109.00 $70.85
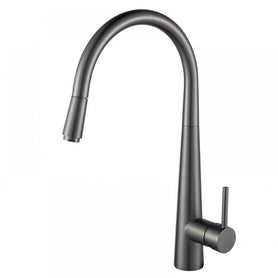
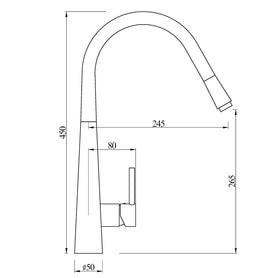
Euro Round Gunmetal Grey 360° Swivel Pull Out Kitchen Sink Mixer Tap Solid Brass - NZHomeware Euro Round Gunmetal Grey 360° Swivel Pull Out Kitchen Sink Mixer Tap Solid Brass - NZHomeware Euro Round Gunmetal Grey 360° Swivel Pull Out Kitchen Sink Mixer Tap Solid Brass - NZHomeware
Best Value Collection-20% off
NZHomeware
$473.00 $378.40
Ottimo Chrome Bathtub/Basin Swivel Wall Mounted Spouts Tapware Bathtub Faucet - NZHomeware Ottimo Chrome Bathtub/Basin Swivel Wall Mounted Spouts Tapware Bathtub Faucet - NZHomeware Ottimo Chrome Bathtub/Basin Swivel Wall Mounted Spouts Tapware Bathtub Faucet - NZHomeware
August Sale-20% Off
NZHomeware
$79.00 $63.20
NZHomeware
$59.00
NZHomeware
$149.00
NZHomeware
$179.00
NZHomeware
$129.00
+

$19.99
Shop now
+

Euro Round Brushed Yellow Gold Bathtub/Basin Swivel Wall Spouts Tapware Bathtub Faucet

$99.00
Shop now
+

Cavon 900x470x560mm Plywood Light Oak Wall Hung Vanity

$829.00
Shop now
+

Solid Brass Brushed Yellow Gold Basin Mixer Tap Bathroom Vanity Tap

$219.00 $175.20
You Save $43.80 (20% Off)
Shop now
+

10 Inch Square Shower Tower Brushed Gold Rain Head Bottom Inlet

$639.00
Shop now
+

860x740mm Special LED Wall Mirror with Motion Sensor Auto On Demister Touch Switch 3 Colours Lighting on 20mm Rim

$379.00 $303.20
You Save $75.80 (20% Off)
Shop now
+

900mm Round LED Bathroom Mirror Gunmetal Grey Backlit with Motion Sensor & Anti Fog

$449.00
Shop now
+

Euro Round Nero Black Tall Basin Mixer Tap Black Taps Tall Tapware

$139.00 $118.15
You Save $20.85 (15% Off)
Shop now
+

530Hx600Wx120Dmm Square Matt Black Electric Heated Towel Rack 5 Bars

$249.00 $211.65
You Save $37.35 (15% Off)
Shop now
+

365mm Bathroom Above Counter Matt Black Ceramic Wash Basin

$129.00
Shop now
+

Euro Round Matt Black Bathtub/Basin Wall Spout

$59.00 $47.20
You Save $11.80 (20% Off)
Shop now
+

690x370x830mm Ceramic White Box Whirlpool Back To Wall Toilets Suite Two Piece Toilets

$339.00 $305.10
You Save $33.90 (10% Off)
Shop now
+

Round Matt Black Shower Rail With Hand Held Shower Set

$129.00
Shop now
+

Euro Round Nero Matt Black Shower/Bath Mixers Diverter

$119.00
Shop now
+

Luma 750X455X450mm Plywood Matte White Fluted Curve Vanity With Flat Top

$779.00 $701.10
You Save $77.90 (10% Off)
Shop now
+

900x900mm Round LED Mirror with Motion Sensor Auto On Demister Backlit 3 Colours Lighting

$419.00 $314.25
You Save $104.75 (25% Off)
Shop now
+

370*370*130mm Round Fluted Above Counter Basin | Gloss White Ceramic Wash Basin NZ

$109.00
Shop now
+

Euro Round Brushed Nickel Bathtub/Basin Swivel Wall Spouts Tapware Bathtub Faucet

$95.00
Shop now
+

Euro Round Solid Brass Brushed Nickel Tall Basin Mixer Bathroom Vanity Tap

$169.00
Shop now
+

665x360x840mm Whirlpool Silent High End Back To Wall Ceramic Toilet Suite

$359.00 $323.10
You Save $35.90 (10% Off)
Shop now
+

$19.99
Shop now
+

$19.99
Shop now
+

$19.99
Shop now
+

$19.99
Shop now
+

Euro Round Brushed Nickel Bathtub/Basin Swivel Wall Spouts Tapware Bathtub Faucet

$95.00
Shop now
+

Euro Round Brushed Nickel Bathtub/Basin Swivel Wall Spouts Tapware Bathtub Faucet

$95.00
Shop now
+

Euro Round Brushed Nickel Bathtub/Basin Swivel Wall Spouts Tapware Bathtub Faucet

$95.00
Shop now

Ideas and Inspiration

Bathroom renovation guides, installation tips, and modern design inspiration for every home.

Show All Posts

Why Maintenance Access Matters in Bathroom Design

CarterOlivia
07 Aug, 2026

A bathroom can look perfectly finished while remaining difficult to repair. Learn how planned access to traps, valves, concealed mixers, LED drivers, cisterns and wastes can prevent unnecessary damage later.

The Missing Dimension: How Mirror Cabinet Projection Changes Bathroom Use

CarterOlivia
30 Jul, 2026

Mirror cabinets are usually compared by width, height and storage. But projection changes how a person leans over the basin, how doors open, whether task lighting conflicts and whether the cabinet can be recessed into the wall.

How High Should a Bathroom Mirror Cabinet Be Installed?

CarterOlivia
02 Jul, 2026

A bathroom mirror cabinet only feels right when the height is right. Set it too low and the room can feel cramped. Set it too high and daily tasks become less comfortable than they should be. The good news is that there is a practical way to get the placement right. A few standard measurements give you a strong starting point, then you adjust for vanity height, tapware, user height, lighting, and the size of the cabinet itself. That approach works far better than relying on a single “standard height” for every bathroom. Standard bathroom mirror cabinet installation height For most homes, the best starting point is to install the bottom of the bathroom mirror cabinet about 150 to 250 mm above the vanity top. In many New Zealand bathrooms, that places the cabinet bottom roughly 1000 to 1150 mm from the finished floor, depending on the vanity height. A second reference point is the mirror centreline. In many adult bathrooms, the centre of the mirror area sits around 1450 to 1600 mm from the floor. This tends to give a comfortable viewing height for most people while still leaving enough space above the basin and tapware. Here is a useful guide for first planning: Measurement point Common starting range Vanity top height from finished floor 850 to 900 mm Gap from vanity top to cabinet bottom 150 to 250 mm Cabinet bottom from finished floor 1000 to 1150 mm Mirror centre from finished floor 1450 to 1600 mm Cabinet top from finished floor 1800 to 2000 mm These numbers are not hard rules. They are a reliable base that helps you avoid the two most common outcomes: a cabinet that feels awkward to use, or one that visually dominates the vanity area. Bathroom mirror cabinet height should match user eye level The most practical method is simple: place the cabinet so the mirror section works well for the people who use it most often. If a household includes adults of average height, the standard ranges above usually work very well. If the main users are especially tall or shorter than average, adjust the position before any holes are drilled. This matters because a mirror cabinet is not just for reflection. It also needs to open comfortably, provide storage that can actually be reached, and sit at a height that does not make routine tasks feel awkward. A well-placed cabinet should let most users see their face and upper torso without crouching or stretching. Bathroom mirror cabinet measurements that matter before installation Height is only one part of the decision. The vanity, basin, tap, wall lights, and cabinet depth all affect the final position. A mirror cabinet that looks good on paper can still cause trouble if it sits too close to a high mixer, a tall benchtop basin, or a pendant light. Before installation, it helps to measure the full wall layout from the finished floor, not from rough framing or unfinished surfaces. That includes the vanity top height, the highest point of the tapware, the cabinet dimensions, and the distance to nearby walls or tall side units. Check these points before settling on the final height: ● Vanity top height ● Basin style and rim height ● Tapware height ● Cabinet depth ● Door opening clearance ● Wall light position ● Power point location ● Main user eye level A little planning at this stage saves patching, repainting, and re-drilling later. How much space to leave above the vanity The gap between the vanity and the cabinet often decides whether the whole installation feels balanced. In many bathrooms, 150 to 250 mm is a comfortable range. That keeps the cabinet close enough to feel connected to the vanity, while still giving room for cleaning and splash clearance. If you have a vessel basin or tall mixer tap, the gap may need to increase. If the vanity uses a low-profile basin and wall-mounted tapware, you may be able to keep the cabinet slightly lower without crowding the space. A good visual check is to stand back and look at the wall as a whole. The cabinet should not appear to float too high above the vanity, and it should not look squeezed down onto the basin area. Bathroom mirror cabinet height for family bathrooms and ensuites Not every bathroom serves the same people, so the right height can shift from room to room. A family bathroom often needs a more flexible placement than a compact ensuite used mainly by two adults. That is why many installers choose a moderate height in shared bathrooms rather than tailoring the cabinet to one very tall or very short person. It keeps the mirror practical for a wider range of users and usually gives the cleanest visual result. A helpful way to think about room type is this: ● Main family bathroom: aim for broad usability and easy reach ● Adult ensuite: prioritise primary user comfort and symmetry ● Guest bathroom: use standard measurements that suit most adults ● Powder room: focus on visual balance and handwashing clearance If children are the concern, it is usually better to keep the cabinet at an adult-friendly height and use a step stool when needed. Installing the cabinet too low for long-term adult use rarely pays off. Bathroom mirror cabinet installation with shaving cabinets and recessed cabinets A shallow mirror cabinet is often more forgiving than a deep shaving cabinet. The deeper the cabinet, the more attention you need to give to projection from the wall, door swing, and how close users stand to the basin. Recessed mirror cabinets give a cleaner look because part of the unit sits inside the wall. That can make them feel less bulky and allow a little more freedom with height. Even then, the mirror still needs to work at eye level, and the shelving still needs to be reachable. When choosing between surface-mounted and recessed options, think about these details: ● Surface-mounted cabinet: faster to fit, more visible depth, easier retrofit ● Recessed cabinet: tidier profile, wall work required, cleaner visual line ● Tall cabinet doors: more storage, greater care needed with top height ● Double-door cabinet: wider access, check side clearance near walls In smaller bathrooms, these details can matter as much as the exact millimetre of installation height. Common bathroom mirror cabinet installation mistakes A surprising number of mirror cabinets end up too high because people centre them on the wall rather than centring them on the user and vanity. That can look neat in a drawing, yet feel wrong the moment someone uses the basin. Another common issue is forgetting about the tap. A tall mixer can collide visually with the cabinet or make the gap feel cramped even if there is technically enough room. Lights can also interfere, especially when wall sconces are already fixed before the cabinet size is finalised. The most frequent mistakes include: ● Ignoring vanity height: the mirror ends up floating too high ● Forgetting tapware clearance: the cabinet feels crowded above the basin ● Measuring before floor finishes: final height changes once tiles go down ● Choosing storage over reach: upper shelves become awkward to access ● Not checking door swing: cabinet doors hit a wall, light, or tall tap These are easy problems to avoid once the full wall is measured as one composition rather than separate products. Bathroom mirror cabinet height for double vanities Double vanities need even more care because symmetry becomes part of the design. A single long mirror cabinet above a double vanity usually looks best when centred across the full width of the vanity unit, not just one basin. That keeps the wall organised and balanced. If two separate mirror cabinets are used, each one should be aligned carefully with its own basin or drawer stack, depending on the design intent. The height should remain consistent across both cabinets even if one user is taller than the other. In larger bathrooms, consistency often matters more than trying to customise each cabinet to a different person. A simple way to mark the right bathroom mirror cabinet height Once your measurements are ready, make a full-size outline on the wall with painter’s tape. This is one of the easiest ways to test whether the chosen height actually feels right in the room. Then walk through a normal morning routine. Stand at the vanity. Reach where the shelves will sit. Open the imaginary door swing. Check the view from the entrance. Turn the lights on and look for glare or shadow lines. A short test run can reveal a lot: 1. Mark vanity top height and tap height. 2. Tape the cabinet outline on the wall. 3. Check face visibility for main users. 4. Confirm door and light clearance. 5. Adjust by small increments before fixing. Even a 20 to 30 mm change can noticeably improve comfort and proportion. Bathroom mirror cabinet advice and product support in New Zealand If you are comparing sizes, finishes, or layouts, seeing a bathroom mirror cabinet in person can make the decision much easier. NZHomeware displays bathroom, kitchen, and laundry products at its Avondale showroom, which helps when you want to judge scale, storage depth, and overall fit rather than relying only on product photos. There is also support available if you are unsure about sizing or product selection. Qualified showroom staff can help answer questions, and the online team is available through live chat on the website. That kind of guidance is especially useful when you are deciding between different cabinet heights, widths, or mounting styles. NZHomeware is known for offering premium-quality products at accessible prices, with a strong focus on customer service. When the right cabinet is paired with the right installation height, the result is a bathroom that feels sharper, more comfortable, and easier to use every day. If you already have your vanity height and cabinet dimensions, you are very close to the answer. Measure from the finished floor, allow sensible clearance above the vanity, and set the mirror where real people can use it comfortably. That is the point where good design stops being theoretical and starts working beautifully in daily life.  

How to Choose the Right Kitchen Sink for Your Home

BennettLiam
30 Jun, 2026

A kitchen sink gets used more than almost any other fixture in the home. It handles food prep, clean-up, soaking, rinsing, and the small routines that keep a kitchen running smoothly. That is why choosing one should go beyond colour and shape alone. The right sink can make a compact kitchen feel more practical, give a busy family better workflow, and support the way you actually cook. The wrong one can leave you short on space, annoyed by splash-back, or stuck with a finish that never quite looks clean. A smart choice starts with function, then brings style into the picture. Why kitchen sink choice affects daily use A sink sits at the centre of the kitchen work zone. It is closely tied to the tap, the benchtop, the dishwasher, and often the rubbish or compost area as well. If the sink is too small, too shallow, or awkwardly placed, that friction shows up every day. It also has a strong visual presence. In many NZ homes, especially open-plan layouts, the sink is visible from dining and living spaces. Its material, rim style, and proportions shape the overall look of the kitchen just as much as cabinet fronts or splashback tiles. A good sink should do three things well: suit your routine, fit your cabinet and bench, and hold up over time. Kitchen sink sizes and bowl configurations Before choosing a finish or installation style, look at size and bowl layout. This is where many people make the clearest gains in usability. Larger is not always better. A kitchen sink should match the cabinet it sits in, leave enough bench space for prep, and still handle your biggest pots and trays. Side-by-side comparison of single-bowl, 1.5-bowl, and double-bowl kitchen sink layouts with typical use cases. Single-bowl sinks are often the most flexible option. They suit keen cooks, larger pans, and modern kitchens where a dishwasher handles most of the daily wash-up. Double-bowl sinks are still popular because they allow two tasks at once, like rinsing vegetables in one side while dirty dishes sit in the other. One-and-a-half bowl designs sit nicely in the middle. The table below gives a practical starting point. Household or kitchen style Recommended bowl setup Why it works Small apartment or compact kitchen Single bowl Keeps more bench space free and still handles daily washing Family kitchen with dishwasher Large single bowl or 1.5 bowl Good capacity with enough flexibility for prep and rinsing Home with frequent hand washing-up Double bowl Separates washing and rinsing tasks Keen home cook using large cookware Deep single bowl Easier fit for roasting trays, stock pots, and oven dishes Multi-user kitchen Double bowl Helps two people use the sink area at once Capacity matters, though bowl shape matters just as much. A wide, gently rounded bowl can be more useful than a narrow deep one. Internal corners also affect cleaning. Tight square corners look sharp, though they can trap grime more readily than slightly softened ones. Kitchen sink materials and finishes Material affects durability, noise, maintenance, and style. Stainless steel remains the most common pick for good reason. It suits almost any kitchen design, works with many tap finishes, and is generally easy to maintain. Still, it is not the only strong option. Composite sinks, often made from granite or quartz blends, have become increasingly popular in contemporary homes. They offer a solid, matte look and are available in darker tones, soft greys, and warmer neutrals. Fireclay and ceramic sinks appeal to those who want a more classic feel, though they tend to need a little more care with heavy cookware. When comparing materials, focus on how you live rather than what looks best in a showroom photo. ● Stainless steel: durable, easy to match with appliances, and available at many price points ● Composite stone: quieter, stylish, and often very resistant to scratching ● Fireclay or ceramic: timeless look with a smooth surface that suits traditional kitchens ● Brushed finishes: better at hiding water marks and fine scratches than highly polished finishes Gauge is worth checking if you choose stainless steel. A thicker steel sink often feels sturdier and can reduce that tinny sound some people dislike. Sound-deադening pads or undercoating help as well, especially in open-plan homes where noise carries. Stainless steel kitchen sinks for practical NZ homes For many households, stainless steel hits the sweet spot between cost, resilience, and low-maintenance care. It works well with laminate, engineered stone, and stainless appliances, and it tends to age gracefully when the finish is brushed rather than mirror-polished. If you want a sink that supports heavy daily use without demanding too much fuss, this material remains a very sensible choice. Kitchen sink installation types for NZ homes Installation style changes both appearance and cleaning. Topmount sinks, sometimes called inset sinks, sit with a visible rim on top of the benchtop. They are usually simpler to install and can be a good fit for many renovations. Undermount sinks are fixed beneath the bench, creating a cleaner line and making it easier to wipe crumbs and water straight into the bowl. Farmhouse or apron-front sinks create a statement and offer generous front access, though they need cabinetry designed to suit them. Integrated sinks, where the sink is formed from the same material as the benchtop, give a very refined look and are often seen in higher-end kitchens. If you are weighing up styles, these broad traits help: ● topmount: easier replacement in many existing kitchens ● undermount: sleek appearance and simpler bench clean-up ● farmhouse: strong visual feature with generous bowl space ● integrated: minimal look with fewer visible joins Benchtop material matters here. Some installations are easier and safer with certain bench types. An undermount sink paired with natural or engineered stone is common, while topmount can be more straightforward with laminate. Always confirm that your chosen sink and bench combination are compatible before ordering. Kitchen sink installation and cleaning trade-offs A sink can look stunning in a brochure, then prove annoying in daily use if cleaning around the edges is awkward. This is why installation style should be judged with a cloth and sponge in mind, not just a mood board. An undermount sink often wins on clean lines. A topmount sink often wins on renovation flexibility and cost. The better option is the one that suits your bench, your budget, and how long you plan to stay in the home. Kitchen sink depth, ergonomics, and cleaning comfort Depth is often overlooked. A deeper sink can hide dishes and reduce splash, which many households appreciate. Yet if it is too deep for the main user, it may become uncomfortable over time, especially when washing large items by hand. Think about who uses the kitchen most and how often. If a dishwasher handles the majority of cleaning, a single deep bowl may be ideal. If there is lots of hand washing, a slightly shallower bowl or double-bowl layout may feel better on the back and shoulders. A few practical checks can prevent regret later: ● A deep bowl: great for soaking and large cookware, though it may feel less comfortable for shorter users ● A moderate depth: often gives the best balance of splash control and comfort ● Tight corners: modern look, though they usually need more careful cleaning ● Rounded corners: easier wipe-down and less grime build-up Drain placement also affects comfort. A rear-set waste can create more flat space on the sink base and leave room below for storage. A central waste can be perfectly fine too, though it may take up the most useful standing area for pots and bowls. Kitchen sink tapware, accessories, and workflow A sink never works alone. Tap height, spout reach, drainboard design, and accessories all shape how useful the area feels. A well-matched mixer can make a modest sink perform far better, while a poorly matched one can create constant splashing. Tall gooseneck mixers look good and help with large pots, though in some settings they can increase splash if the spout sits too high above the bowl. Pull-out sprays are handy for rinsing corners and washing produce. If the sink sits in front of a window, clearance becomes important too. Accessories can be surprisingly valuable. Some sinks come with or support add-ons that turn the sink into a prep station. ● colanders ● chopping boards ● drying racks ● basket wastes ● protective bottom grids These additions are especially useful in smaller kitchens, where the sink can double as prep space without crowding the bench. Choosing a kitchen sink for your cooking habits The best sink is the one that fits your household rhythm. Someone who cooks most nights, bakes often, and uses oversized cookware will value width and depth. A household that relies on takeaway, a dishwasher, and quick clean-ups may be happier with a smaller, simpler model that leaves more room on the bench. Style matters too, though it should follow function. A black composite sink can look striking in a modern kitchen, though it may show pale residue in hard-water areas. A white fireclay sink can bring warmth and character, though it will need regular care to stay fresh-looking. A brushed stainless sink tends to stay versatile as surrounding finishes change over the years. If you are planning a renovation, think one step ahead. Ask whether your sink choice still makes sense if your household changes, if children become more involved in the kitchen, or if you plan to sell in a few years. Broadly appealing choices often age well, especially when paired with solid practicality. Questions to ask before buying a kitchen sink A short checklist can save time and money. It also helps when comparing products online, where dimensions and installation notes can be easy to skim past. ● Cabinet size: what is the minimum base cabinet width required? ● Benchtop type: is the sink suitable for laminate, stone, timber, or another surface? ● Waste fittings: what is included, and will it work with your plumbing set-up? ● Tap hole configuration: is the sink pre-drilled, or can it be adapted? ● Care requirements: how much day-to-day maintenance does the material need? ● Noise control: does the sink include sound-deadening features? If possible, measure a few everyday items before you buy. The roasting dish, stock pot, oven tray, and air fryer basket can tell you more than product marketing ever will. Where to compare kitchen sink options in person and online Photos help, though they rarely tell the full story. Seeing sinks in person makes it much easier to judge bowl depth, corner shape, finish texture, and overall scale. If a showroom is available, it is worth taking along your cabinet width, benchtop details, and a few rough measurements from your kitchen. Some retailers display kitchen, bathroom, and laundry products in showrooms in places like Avondale, which can be useful if you want to compare styles side by side. Qualified staff can often answer practical questions about fit, installation, and compatible accessories. If you are shopping online, live chat support can be just as helpful for checking dimensions, stock, and product details before you place an order. A kitchen sink may seem like a small decision early in a renovation, yet it shapes daily life in a very real way. When size, material, installation, and workflow all work together, the whole kitchen feels more capable from the first day you use it. Choose the Right Kitchen Sink with Confidence Selecting the right kitchen sink can make a significant difference to how your kitchen looks, feels, and functions every day. From choosing the right size and bowl configuration to comparing materials and installation styles, every detail plays a role in creating a kitchen that is both practical and visually appealing. At NZHomeware, we provide a wide range of quality kitchen sinks, tapware, and homeware solutions to suit modern New Zealand homes. Whether you are planning a full kitchen renovation or simply upgrading your sink area, our experienced team can help you find products that balance durability, style, and everyday functionality. Visit the NZHomeware showroom in Avondale or browse online to explore our latest kitchen and bathroom collections.

How to Prevent Mould in Bathrooms in New Zealand

PatelArjun
21 May, 2026

How to Prevent Mould in Bathrooms in New Zealand Mould is one of the most persistent bathroom problems in New Zealand homes. It stains grout, marks ceilings, affects indoor air quality, and can make a well-finished room feel tired long before its time. In a space that deals with steam, splashes, and limited airflow every day, mould prevention is less about one miracle product and more about smart design, sensible routines, and materials that cope well with moisture. That is where bathroom planning matters more than many people expect. A well-chosen bathroom vanity should do more than look good. In NZ homes, it also needs to support airflow, make cleaning easier, and handle the humid conditions common in many bathrooms Why Mould Grows Quickly in New Zealand Bathrooms New Zealand bathrooms often face a difficult mix of factors. Winter temperatures can be low, many homes deal with condensation, and smaller bathrooms may have limited ventilation. Add a hot shower to that mix, and moisture has every chance to settle on walls, ceilings, mirrors, joinery, and inside cabinetry. Mould does not need a flood or a leak to thrive. It only needs regular moisture, mild warmth, and a surface that stays damp long enough. Ceiling corners, silicone edges, vanity kickboards, drawer interiors, and window frames are all common trouble spots because they can hold moisture after the room seems dry. The hidden issue is often time. If a bathroom remains damp for hours after use, mould has repeated opportunities to establish itself. Prevention is about shortening that damp period as much as possible. Bathroom area Why mould forms there Practical fix Ceiling and upper walls Steam rises and condenses on cooler surfaces Use extraction early and keep airflow going after showers Grout and silicone Water sits in joints and takes longer to dry Wipe down wet zones and replace failing sealant Window frames Condensation collects on cold glass and joins Dry frames daily and improve ventilation Behind or under the vanity Poor airflow and occasional splashes Choose designs that allow easier cleaning and drying Inside vanity cupboards Damp towels, plumbing condensation, trapped humidity Keep contents dry and avoid overfilling storage Daily Bathroom Habits That Keep Surfaces Dry The most effective mould prevention methods are often simple, repeatable habits. They work because they cut moisture before it settles deeply into surfaces and joins. A bathroom does not need to be scrubbed every day, but it does need a quick reset after heavy use. A one-minute wipe of the shower screen, a few extra minutes with the fan running, and a towel hung properly rather than bunched in a corner can make a noticeable difference over a month. These habits are worth building into the daily routine: Run the extraction fan before the shower starts Wipe glass, taps, and tiles after use Leave shower doors or curtains open to dry Spread towels out fully Keep bath mats dry between uses Open a window when weather allows When several people use the same bathroom in quick succession, moisture levels climb fast. In that case, ventilation becomes even more important, and storage choices matter too. Packed vanity drawers filled with damp face cloths, cleaning cloths, or spare towels can trap lingering humidity where it is easy to miss. Ventilation and Heating Choices That Cut Mould Risk Good ventilation is the strongest defence against bathroom mould. If the room cannot release steam quickly, moisture will settle somewhere, even in a freshly renovated space. An extraction fan that is correctly sized and properly ducted is usually far more effective than relying on an open window alone. Fans should run long enough to remove humid air after the shower has finished, not just during it. Timers are useful because they take the guesswork out of the process. If the fan is noisy or weak, people are less likely to use it consistently, which turns a minor equipment issue into a long-term mould problem. Heating helps too, though its role is often misunderstood. Warm air can hold more moisture, which sounds helpful, but the real benefit comes when heating supports drying. A bathroom that is lightly warmed, ventilated, and kept free of condensation will dry out much faster than a cold room with no airflow. There is also a design angle here. If mirrors, walls, and vanity surfaces are regularly dripping after showers, the room may be signalling a ventilation gap rather than a cleaning problem. Choosing a Bathroom Vanity in NZ That Stays Dry A vanity is one of the hardest-working pieces in the bathroom. It sits close to splashing water, handles daily use, and often hides plumbing in a small enclosed space. That makes material choice, storage layout, and installation details especially important if mould prevention is the goal. Some vanities are easier to live with in humid conditions than others. Smooth, non-porous finishes are generally simpler to wipe down. Well-sealed edges matter, especially around basins and exposed joins. If a cabinet edge is vulnerable to repeated splashes, it may swell over time, and once that happens, cleaning becomes harder and moisture control gets worse. Wall-hung vanities are often a smart option in smaller bathrooms. Because the floor remains visible underneath, cleaning is easier and air can move more freely around the base. That can reduce the damp, dusty zones where mould often starts unnoticed. Floor-standing vanities can still work very well, though they benefit from thoughtful placement and enough clearance for regular cleaning around them. Storage design matters just as much as the finish. Deep drawers are practical, but they should not become storage for damp items. Open shelves can look attractive, though they need disciplined styling and dry contents. A bathroom vanity buyers choose should suit the way the room is used, not just the look of the room on installation day. When comparing options, these features are worth paying attention to: Moisture-resistant cabinet materials – Better suited to humid rooms and regular exposure to steam Wall-hung installation – Easier floor cleaning and better airflow beneath the unit Quality edge sealing – Helps limit water entry around vulnerable joins Integrated basin designs – Fewer awkward gaps where moisture and grime can collect Practical drawer layout – Reduces the temptation to store damp items in closed spaces The basin itself can help or hinder mould prevention. Shapes with sharp corners, deep rear ledges, or tight creases around the tap zone can hold water spots and residue. Cleaner profiles are usually easier to maintain, which means the vanity stays drier and hygienic with less effort. Cleaning Routines That Stop Mould Before It Spreads Bathrooms do not need harsh treatment every day, though they do need consistency. Mould often starts as a fine discolouration around silicone, grout, painted ceilings, or the underside of vanity tops. Catching it early keeps the response simple. A gentle weekly clean is more effective than an occasional heavy clean. That is because mould spores settle constantly in damp rooms. If surfaces are cleaned before visible build-up forms, they are less likely to develop those stubborn black patches that seem to return no matter how much scrubbing is done. Pay close attention to spots that are easy to miss. The bottom edge of a mirror cabinet, the back corners of the vanity top, and the area around pipe cut-outs inside cabinetry are all worth checking. A simple routine might look like this: Dry first – Remove surface moisture from glass, tiles, and vanity tops before using any cleaner Clean problem zones – Focus on grout lines, silicone edges, basin joins, and cupboard interiors Air the room – Leave the fan running or open a window so cleaned surfaces dry properly If mould keeps returning to painted areas, it may be time to review the paint system as well. Bathrooms benefit from coatings made for wet areas, especially on ceilings where condensation tends to gather. Bathroom Design Details That Make Mould Prevention Easier Small design choices can reduce mould risk every single day without adding effort. A vanity with enough bench space to keep toiletries organised means fewer bottles sitting in damp corners. Good task lighting helps people notice moisture and grime early. Easy-clean tapware and basin forms save time, which makes regular wiping far more likely. The relationship between vanity and wall also matters. If the splashback area is awkward to access or packed with sealant lines, cleaning becomes a chore. Simpler surfaces usually stay cleaner because they ask less of the person using them. Even towel placement affects results. If wet towels are constantly draped over vanity doors, moisture transfer becomes part of the daily pattern. Hooks, rails, and ventilation should work together, not compete for the same small pocket of wall space. Choosing the Right Bathroom Vanity in NZ: Where to Get Help When mould prevention is part of a renovation plan, product advice is valuable. It helps to compare vanity materials, storage formats, and installation styles in person, especially if the bathroom is compact or has a history of condensation. Seeing products up close can make details like edge finishing, drawer construction, and surface maintenance much easier to judge. Some homeowners prefer to visit a showroom to see materials and finishes in person, while others like to compare options online. At NZHomeware, we offer both. You can explore a wide range of bathroom, kitchen, and laundry products at our Avondale showroom, or use our online chat to get guidance on sizes, layouts, and product choices before you buy. That kind of guidance is most useful when you bring real bathroom conditions into the conversation. Mention whether the room has a window, whether the fan is ducted, how many people use the bathroom, and whether mould tends to appear on ceilings, around the vanity, or inside storage. Product choice works best when it responds to the actual moisture pattern in the room. When Recurring Bathroom Mould Points to a Bigger Problem If you are cleaning regularly, ventilating well, and still seeing mould return quickly, it may be a sign of something deeper. Leaking plumbing under the vanity, failed waterproofing, poor insulation, or an underperforming extraction fan can all create hidden moisture that daily cleaning will never solve. This is especially relevant when mould forms inside cabinets or at the back of a bathroom vanity that homeowners assumed was protected from direct water exposure. Those signs often point to condensation around pipework, trapped humid air, or a minor leak that has gone unnoticed. The encouraging part is that mould prevention is highly practical. Better drying habits, stronger ventilation, and more suitable bathroom materials can make a dramatic difference. In many cases, a smarter vanity choice is part of that shift, because good bathroom design is not only about style. It shapes how well the room copes with moisture every day.

7 Benefits of having a Bathtub in your Home

Jack
17 May, 2026

As known that a bathtub is a bathroom item which can bring people happiness, allowing people to enjoy the comfort and pleasure brought by bathing and also improve the quality of life.Today will look at how a bathtub benefit your life in the following. 1.Health and wellness benefits When you come home from an exhausting busy day, you can lie down with hot water if you have a bathtub at home, close your eyes and enjoy a moment of tranquility and relaxation.Taking a bath can promote the blood circulation of the whole body, making people feel hot and warm.It is not only can effectively loosen the muscles and bones, relieve the pain of shoulder,neck,low back,but also improve the quality of sleep. 2. Create a sanctuary for relaxation Modern people are under a lot of pressure from work and life.. It is recommended to take half an hour to take a bath at night. You will find that taking a bath can relax your emotions.Your private bathroom can be a sanctuary to unwind in after a hard day—either yourself or with your partner. 3.Family sharing The bathtub is also very convenient for families with children.Some children are not always cooperative in bathing,but if there is a bathtub,the experience will be completely different.Putting a few cute toys in the bathtub can attract children's attention and enhance the fun of bathing.And the water temperature of the bathtub will not drop significantly in a short period of time, so there is no need to worry about catching colds. Additionally,elderly individuals who require assistance bathing will also benefit from having a bathtub as it is much easier to bath individuals than using a shower.   4.Help to create a desirable bathroom It is easy to find various kind of bathtub in market,including different types,sizes,materials and colors.You can choose the ideal bathtub according to your actual household need and decorate the perfect bathroom. 5.Make good use of water By using a bathtub,you can easily know the amount of water used,which will help to check the water bill.The used water can be stored in the bathtub for second use,like flushing the toilet. 6.House value added According to most real estate agents,it is more easier to sell or rent the house with at least one bathtub in bathroom.A nice bathtub is beneficial to resale house, a considerable part of people will prefer a house with perfect equipment. 7.Free style of bath With a bathtub you can use the bath bomb together or enjoy the bubble bath.DIY your bath style with the material you prefer, like milk,petal,etc,increase the joy of life. we If you have the space and desire, a bathtub will be a wonderful choose for more quality life,please check on www.nzhomeware.co.nz for your ideal bathtub.

What is the Best Material for a Bathtub?

Liam
14 May, 2026

Bathtub materials influence the appearance, weight, heat retention, and price of these expensive plumbing fixtures. And, because tubs are not easily replaced, it is critical to understand what you are purchasing so that you are satisfied with your purchase for many years to come. Here are names of the best bathtub material that will assist you in making the best decision when purchasing a new bathtub.   Porcelain Enameled Steel Porcelain-enameled steel is a popular and typically low-cost choice. This tub is somewhat heavier than acrylic or fiberglass but significantly lighter than old-fashioned enameled cast iron. It is made of steel sheets that have been covered with porcelain enamel. Pros · Can be highly inexpensive. · Lightweight in comparison · There are standard versions available (60 x 30 inches) · Durable · Simple to clean Cons · When things are dropped, the surface might chip. · Rust may develop on even the smallest of chips. · Color and form possibilities are limited. · If not properly insulated, it may be rather loud. · Heats up rapidly.   Acrylic Acrylic tubs are popular because of their adaptability, durability, variety of possibilities, and inexpensive cost. This tub is constructed of vacuum-formed acrylic sheets reinforced with fiberglass. Acrylic tubs are lightweight and straightforward to set up. Pros · Lightweight · Affordable · There are several colour, form, and style options available. · Durable · Non-porous surface · The cover can be repaired. Cons · If abrasive cleaners are used to clean the surface, it may scrape. · During installation, stress areas must be carefully strengthened. · Acrylic costs more than fiberglass.   Fiberglass Another low-cost bathtub material is fiberglass. This tub is constructed with layers of surface coat, polyester resin, and fiberglass reinforcing. Fiberglass tubs are less costly than acrylic tubs but have a shorter lifespan. Pros · Lightweight · Simple to set up · Insufficient cost · Simple to clean and maintain · The surface is repairable. · A fantastic alternative for a shower/tub combo.   Cons   · Not as long-lasting as other materials · The surface is prone to cracking and scratching. · The finish is prone to fading. · Color selections are limited.   Enamelled Cast Iron Enamelled cast iron is a classic bathtub material that is sturdy and weighty. The tub is composed of porcelain-enameled molded iron. The weight is the only noticeable downside (and a severe one). A cast-iron tub is a more expensive alternative, but it is a long-term investment. Because of its importance, a cast-iron tub can be challenging to install and may need structural reinforcing of the floor. Pro Tips: Because of its endurance, many professionals favor enameled cast iron. 1 When damaged, this material may be refinished, increasing its longevity even further. Pros · Very durable · Thick enamel is resilient to breaking and scratches. · Can be resurfaced · Timeless look  · Excellent heat retention · Many color choices available Cons · Very heavy   Cast Polymer Materials for cast polymer bathtubs include designed natural stone and solid surface materials. Minerals, polymeric compounds, and resins are molded to make a solid material akin to solid-surface countertops (such as Corian). A gel-coat finish is often applied to the tubs. Pros · Can be reasonably priced · There are several color choices. · Surface scratches are easily wiped away. · Mildew and stain resistance Cons · Brittleness is possible. ·  Gel coat wear might result in irreversible cracks. Stone Resin Stone resin is a compound used to mimic the appearance of natural stone. This is one of the most effective bathtub materials. It has a significant aspect. It's made of crushed actual stone and stone-looking polymer resin. These tubs are heavy and require unusual fundamental surrounds to support their weight. As you can expect, any of these authentic, one-of-a-kind sculptures has a fantastic "wow factor." This comes with a hefty price tag. Pros  Stone resin has an extremely long lifespan, lasting for quite some time without the need for frequent maintenance, and when it does need to be thrown, it is 100 percent recyclable. Cons While it is more expensive than acrylic or fibreglass, stone resin can survive the test of time and will save you a lot of trouble in the long run. Conclusion So, this is the wrap. Now you can see easily choose the best bathtub for your house and enhance your bathing experience.  

Freestanding Bath vs Built-in Bath: What You Need to Know Before Buying

Liam
11 May, 2026

Liam BennettA bath sets the mood for the whole bathroom. It changes how you use the space, how it looks, and how much the renovation costs. Before you settle on a shape you love, it pays to weigh up how freestanding and built-in options behave in real Kiwi homes, from compact villa bathrooms to generous new-build ensuites. Style matters, yet so do drainage points, waterproofing details, and the height of the bath rim. Small factors change daily comfort. A good choice feels effortless each time you soak. What a freestanding bath brings to a bathroom A freestanding bath reads like furniture. It sits proud of walls, so you see its shape in full, which suits minimalist spaces and heritage character alike. This makes it a visual anchor. Place it under a window, centre it in a large room, or pull it slightly away from a wall to give it breathing room. Freedom of placement has limits. You still need floor waste access, a mixer location, and enough space to clean around the bath. The sweet spot is often 100 to 150 mm clearance on the long sides and a bit more at one end for a floor-mounted mixer or hand shower. With air around the bath, cleaning is simple in theory. In practice, dust loves the narrow gap between tub and wall. Some homeowners place the bath tight to the wall to reduce the unseen crevice, then seal the top edge neatly. Either approach can work, just keep wipe-down access in mind. Plumbing is a design decision here. A floor-mounted bath filler looks sculptural. A wall-mounted spout simplifies floor waterproofing and leaves the floor less busy. If you are changing waste or water points, allow for more labour than a like-for-like swap. However, there is a smart compromise: the Back-to-Wall Freestanding Bath. These models look just like a luxury freestanding tub from the front but have a flat back that sits flush against your wall. You get the \'hotel look\' without the dust trap—perfect for busy Kiwi households. Why a built-in bath still wins fans A built-in bath tucks into an alcove or a framed hob, then gets lined and tiled or cladded. That creates a ledge for candles, shampoos, and elbows, which is handy in family bathrooms. The wall on one or two sides also makes it easy to add shelves and grab rails. Water control is superb. If you want a shower-over-bath, a built-in layout with a straight internal wall for a fixed screen keeps splashes in check. The tiled or acrylic lining behind the shower reaches the right height and the hob edge can be made dead level. Cleaning is predictable. There are fewer tight gaps, and the wall junction is sealed. The trade-off is that a tiled surround needs quality workmanship and the grout needs occasional care. When done well, built-ins look crisp and last for years. Side-by-side comparison at a glance The differences come through in dimension planning, waterproofing, and budget. The table below summarises typical points for New Zealand homes. These are indicative ranges, not quotes, and assume a licensed plumber and tiler. Factor Freestanding bath Built-in bath Typical footprint 1500 to 1700 mm long, 700 to 800 mm wide Similar tub size, but total width increases with hob and wall linings Placement Flexible, can float or sit near a wall Usually fixed into an alcove or framed hob Waterproofing Localised to floor around bath and mixer penetrations Wider area, especially for shower-over-bath Cleaning access Easy around exterior, tricky if tight to wall Simple surfaces, fewer hidden gaps Thermal feel Air around tub cools faster, insulation helps Surrounded tub can hold warmth a little longer Plumbing look Floor or wall spout becomes a feature Spout and mixer on wall or hob, less conspicuous Shower capability Possible but splashy without full surround Excellent with screen and linear drain Install time Often shorter if services are already placed Framing, lining, and tiling add steps Cost range for tub About $1,200 to $6,000+ About $400 to $2,500 for tub, plus surround materials Labour variables Floor mixer, waste relocation, floor waste Framing, waterproofing, tiling, shower screen Room size, layout, and clearances Older villas and bungalows often have bathrooms from 2 to 3 m wide, with mixed joist directions and timber floors. Newer townhouses and family homes usually allow a little more depth. Either way, measure the path to the room first. Stair corners and doorways can stop a 1700 mm bath from getting in. Clearances influence day-to-day comfort more than most people expect. Aim for a minimum of 700 mm walkway in front of the bath. Leave space around the mixer for maintenance, and ensure you can reach the plug and overflow without leaning dangerously. If you plan a freestanding model close to a wall, keep at least a hand-width gap unless you will silicone the top edge to stop water running down the back. Ergonomics and how a bath actually feels Internal shape changes the soak. Slipper baths support the back and neck for long soaks, but reduce the flat area for kids’ bath toys. A symmetrical double-ended bath keeps the waste in the centre and gives two lounging positions. Straight-sided built-ins with a slight recline are great when you stand to shower. Depth is a comfort multiplier. Around 420 to 460 mm internal water depth feels deep enough for adults, and the rim height needs to be manageable for children or older family members. If mobility is a concern, consider a lower rim and a nearby rail. For a shower-over-bath, a flat internal base underfoot and enough shoulder width reduce slips. Materials, weight, and maintenance Material choice changes weight, water temperature profile, and scratch resistance. It also affects how the bath meets surrounding finishes. Your floor structure sets an upper limit for heavy tubs, especially in older timber homes. Here is a fast overview of common materials and what they live like day to day. ● Acrylic: Warm to touch, light weight, cost effective, easy to repair small scratches. ● Steel enamel: Tough surface with crisp lines, great heat transfer at first fill, cooler feel without warm water top-ups. ● Cast iron: Very durable and classic, heavy and usually needs floor assessment, excellent heat retention once warmed. ● Stone composite: Solid feel and premium look, mid to heavy weight, holds heat well, needs gentle cleaners. ● Solid surface: Seamless and matte, repairable for minor marks, watch for higher weight and price. ● Pressed steel with coating: Budget friendly, thinner feel than enamelled steel, good for rentals and quick refits. Waterproofing, ventilation, and code basics Bathrooms in New Zealand must be detailed to handle moisture. Under the Building Code clause E3 Internal Moisture, wet areas need impervious finishes and correct falls to wastes. A shower-over-bath raises the bar: wall linings near the shower need to reach the correct height and junctions need to be sealed to spec. A freestanding bath without a shower still needs wet area floor finishes near the mixer and at any penetrations. Ventilation matters regardless of bath style. An efficient extraction fan ducted outside, not into the roof cavity, protects paint and trims. This is vital in smaller spaces or homes in cooler regions where condensation lingers. Talk with a licensed plumber and tiler about linear drains, floor wastes, and the grade of waterproofing membrane needed. That discussion up front can save rework. Can a freestanding bath double as a shower? It can, and many people try, but it takes care. A circular rail with a curtain can handle splashes, yet water will still track along the floor if the fall to the waste is poor. A glass screen can be customised to wrap part of the bath, though cleaning the glass curve is a chore and movement in timber floors can stress fixings. If a daily shower is non-negotiable, a built-in bath with a proper screen or a separate shower is usually cleaner to live with. Freestanding baths shine as soak tubs when paired with a separate shower. Budget planning and hidden costs The price tag on the bath is only part of the story. A freestanding setup often needs a floor-mounted mixer or an extended spout, which adds to plumbing and fixture costs. If waste or water points are not where you need them, allow for extra labour. Built-in baths add framing, lining, waterproofing, and tiling or cladding. The pay-off is a combined bath-shower that does two jobs well, and a ledge that keeps bottles off the floor. Tiling labour in Auckland varies with tile size and layout, so a quote based on your plans is worth getting before demolition. Whichever direction you go, allow a contingency for small surprises under old floors, and for a new floor waste if the existing one is out of position. Water use, hot water size, and comfort A big freestanding bath looks amazing. It may also hold 250 to 300 litres when full, which can outstrip a standard 180 litre cylinder. If your hot water is a cylinder rather than continuous gas, match bath volume to actual hot water capacity so your soak stays warm. Insulation helps. Some acrylic and composite tubs include insulation; if not, ask your installer about adding a thermal blanket under and around the bath where it will not trap moisture. A well-positioned mixer with a decent flow rate reduces the cold edge that forms during a slow fill. Try before you buy in Auckland or online Photos hide a lot. Sitting in a display bath tells you more than any spec sheet can, from how the rim sits under the knees to how the backrest feels between the shoulder blades. If you can, visit a showroom and hop in, shoes off of course. Bring your measurements and a quick sketch of your room. NZHomeware’s showroom in Avondale carries a wide range for bathrooms, kitchens, and laundries. The team on site can help you compare freestanding and built-in options, talk through mixer placements, and map clearances so installation goes smoothly. If you prefer to plan from home, the online crew on live chat can guide you through specs and availability, then follow up with answers to trickier questions. As a manufacturer and retailer, NZHomeware focuses on solid build quality paired with fair pricing. That combination, plus responsive support from a large, professional team, has helped many Auckland homeowners shape bathrooms that match their vision from first look to final wipe down. A practical checklist for your choice Before you commit, run through a few key points. Write them down while you stand in the room and the decision becomes clearer. ● Room size and access paths ● Shower needs, now and in five years ● Hot water capacity vs bath volume ● Cleaning preferences and time ● Budget for labour, not just fixtures ● Plumbing points: where the waste and water currently sit ● Ventilation: fan strength and ducting to outside ● Surface finishes: tiles, acrylic liners, or composite panels ● Materials: weight limits for upper floors and timber framing ● Safety: rim height, handholds, and non-slip plans Good planning turns a bath from a nice-to-have into the heart of a bathroom. If you would like help shortening the shortlist, bring your floor plan and questions to the Avondale showroom, or jump onto live chat and a specialist can run through options that fit your space, taste, and budget.
Brand We Work With